
![]()
Fire Immuniser
+91-7829629111
Email: info@variex.in
Varistor Technologies Pvt. Ltd.
Block-1, First Floor, Ardente Office One, Hoodi Circle, ITPL Main Road, Bengaluru, Karnataka 560048, IN
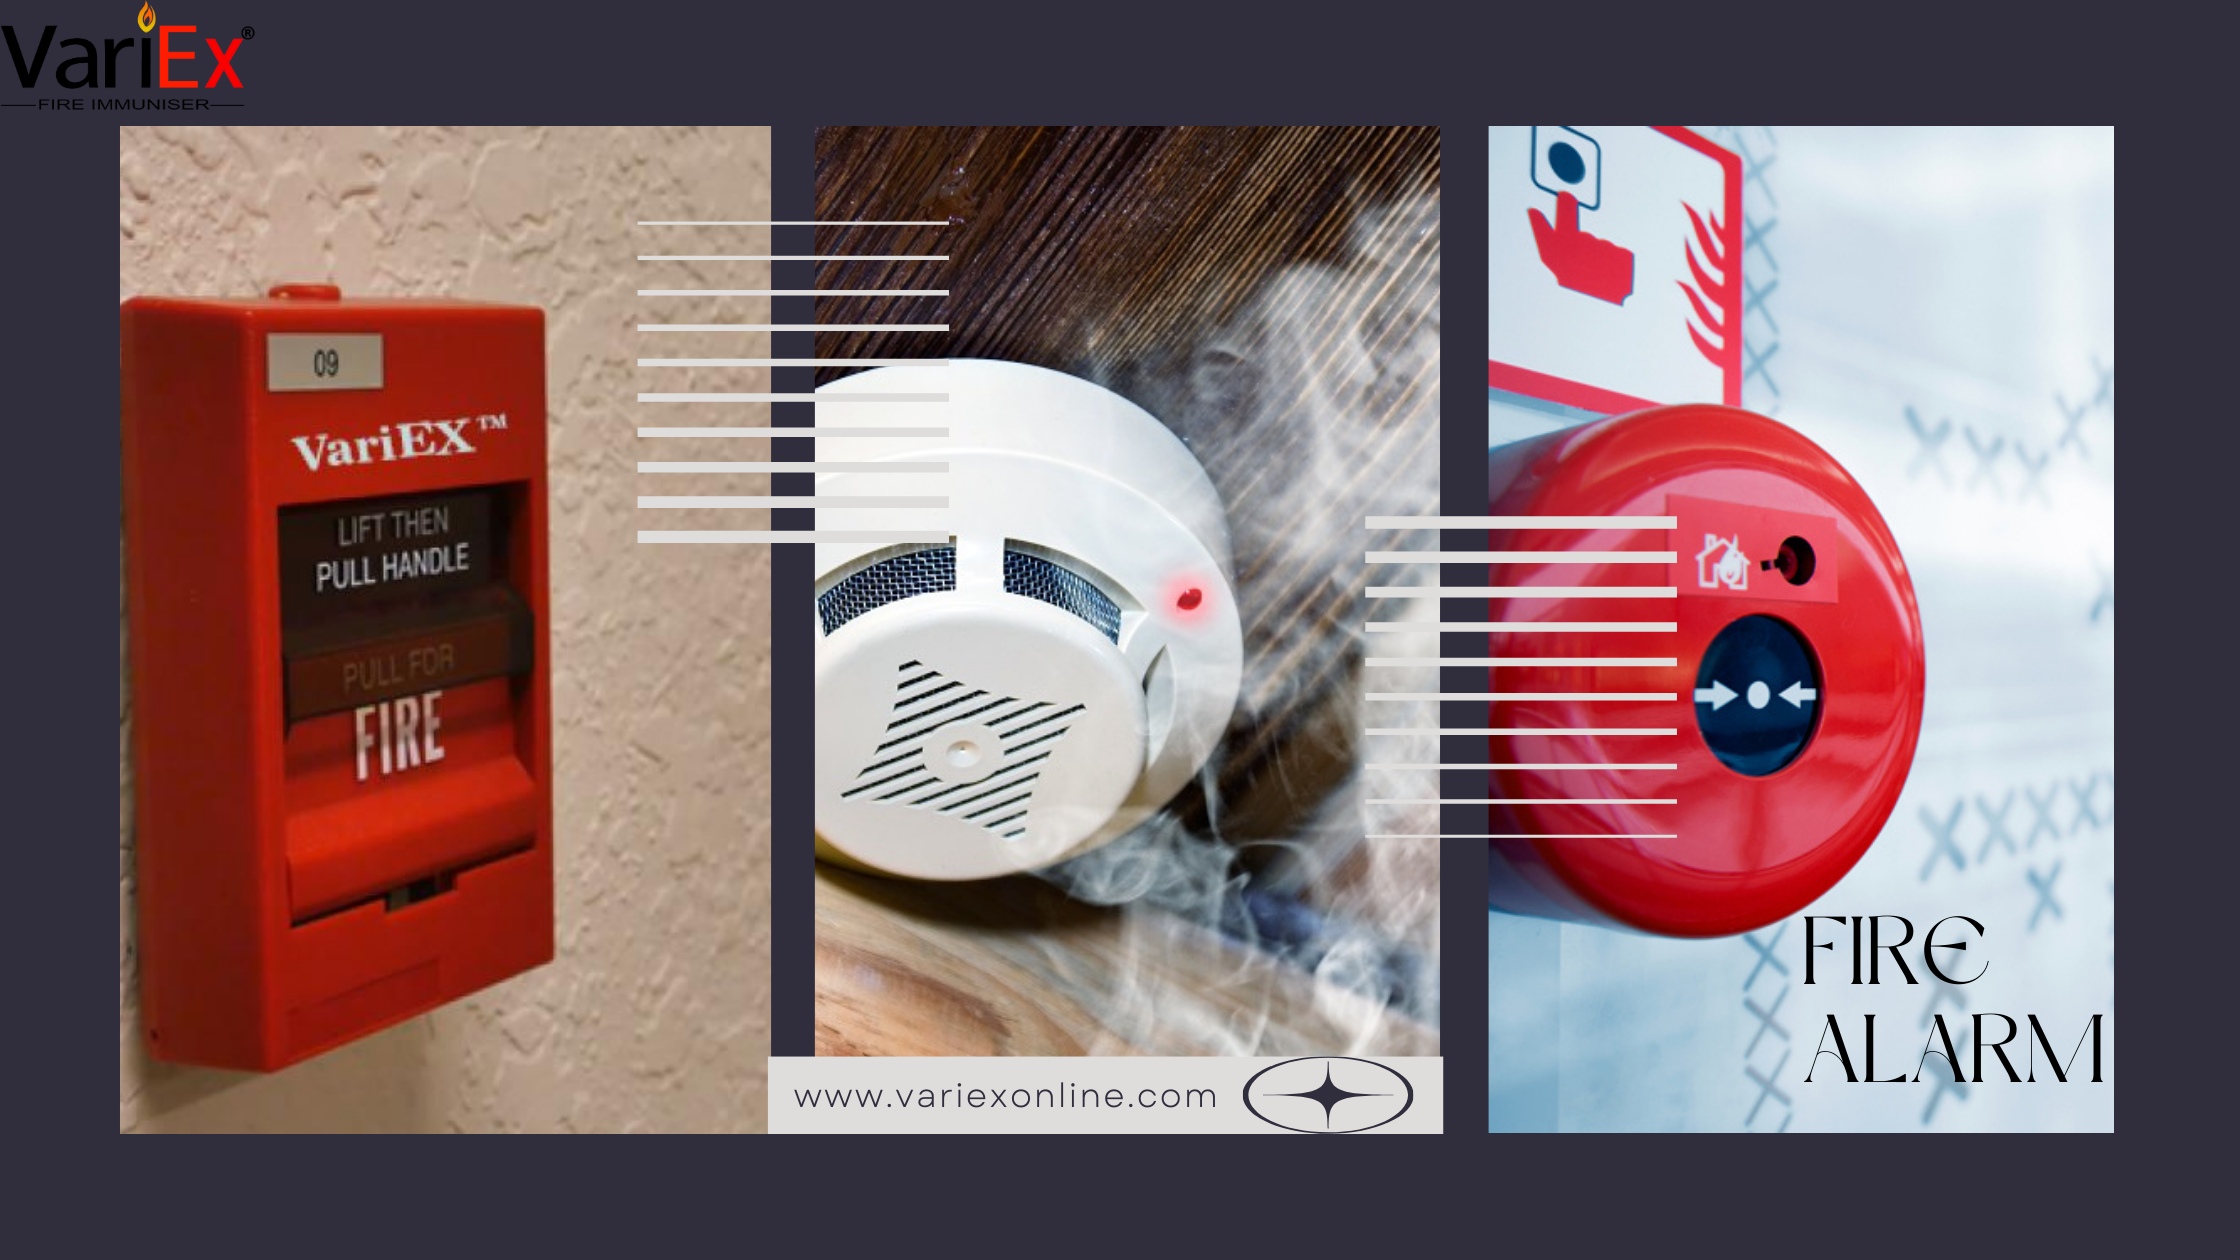
How To Connect Fire Alarm
How To Connect Fire Alarm
Installing and connecting a fire alarm system is an essential part of ensuring the safety of a building’s occupants. Proper installation and connection ensure that the system functions correctly, providing early detection of fires and enabling swift action in emergencies. Whether you’re installing a new system, upgrading an old one, or conducting a regular maintenance check, it's important to follow the correct procedures for connecting each component of the system.
Here’s a comprehensive, step-by-step guide on how to connect a fire alarm system.
Step 1: Planning and Preparation
Before connecting the fire alarm system, you need to plan the installation carefully. A well-thought-out system ensures that every part of the building is adequately covered.
1.1 Identify System Requirements
- Choose the type of fire alarm system: Decide between a conventional fire alarm system (suitable for smaller buildings) or an addressable fire alarm system (used for larger or more complex buildings).
- Determine the components you need: A typical fire alarm system includes the following components:
- Control Panel: The main unit that monitors the system.
- Smoke Detectors and Heat Detectors: Devices that sense the presence of smoke or heat.
- Manual Call Points (Pull Stations): For manual activation by building occupants.
- Alarm Sounders and Visual Indicators: To alert occupants of a fire.
- Wiring: Cables to connect all devices.
1.2 Check Local Regulations
Before proceeding, make sure your installation follows local fire safety codes and regulations (e.g., NFPA 72 in the U.S., BS 5839 in the UK). These codes govern the placement, wiring, and testing of fire alarm systems.
Step 2: Install the Control Panel
The control panel is the central hub of the fire alarm system, responsible for receiving signals from detectors and activating alarms.
2.1 Mount the Control Panel
- Choose a central location that's easily accessible, usually near an entrance or in an electrical room.
- Use mounting hardware (screws, anchors) to secure the control panel on a flat surface. Ensure the panel is mounted at a comfortable height, typically around eye level.
2.2 Connect Power Supply
- Connect the control panel to the power source, ensuring the panel is powered by both the main electrical supply and a backup battery (usually 12V or 24V). The backup battery ensures the system works in case of a power failure.
- Verify that the control panel is powered up, indicated by a green "Power" light.
2.3 Run Wires to the Control Panel
- Run wires from the detectors, call points, and alarm devices to the control panel. In a conventional system, you may wire devices in zones, while in an addressable system, each device will have a unique address.
- Follow the wiring diagram provided by the manufacturer to ensure correct connections.
Step 3: Connect the Detectors
Smoke and heat detectors play a vital role in detecting a fire in its early stages. Proper installation and connection are critical to the effectiveness of the fire alarm system.
3.1 Install Smoke and Heat Detectors
- Mount smoke detectors on the ceiling, at least 4 inches from walls and away from obstructions like vents or light fixtures.
- Install heat detectors in areas prone to false alarms, such as kitchens or storage rooms, where smoke detectors might be less effective.
3.2 Connect Wires to Detectors
- For conventional systems: Wire the detectors in series or parallel, depending on the manufacturer’s guidelines. Each group of detectors will correspond to a zone on the control panel.
- For addressable systems: Wire the detectors using two-wire loops, and assign each detector a unique address. The system will be able to pinpoint the exact location of the fire based on which detector is activated.
- Check detector polarity: Ensure that the positive and negative terminals are connected correctly, as incorrect wiring can prevent detectors from working.
3.3 Test Detectors
- Once connected, test the detectors using the test function on the control panel or with smoke simulators. Smoke detectors should trigger the alarm when exposed to smoke, while heat detectors should respond to temperature changes.
Step 4: Connect Manual Call Points (Pull Stations)
Manual call points (or pull stations) allow people to manually activate the fire alarm when they notice a fire.
4.1 Install Call Points
- Mount manual call points at accessible locations, typically near exits or in hallways, at a height of about 4 to 5 feet from the floor.
- Ensure the pull stations are visible, unobstructed, and easy to reach during an emergency.
4.2 Wire the Call Points
- Connect the call points to the fire alarm system's wiring, ensuring they are integrated with the control panel.
- In conventional systems, manual pull stations are wired into zones, whereas in addressable systems, each station is assigned a unique address.
4.3 Test Call Points
- Pull the manual call points to verify the system activates the alarm. You should hear the alarm sound and see a visual indicator (flashing strobe lights) if the system is connected correctly.
Step 5: Connect Alarm Sounders and Visual Indicators
Alarm sounders (bells, horns, sirens) and visual indicators (strobes or flashing lights) are essential for notifying building occupants of a fire emergency.
5.1 Install Sounders and Visual Indicators
- Place sounders in locations such as hallways, stairwells, and meeting rooms where they can be heard clearly. Ensure the alarm sound is audible throughout the entire building.
- Install strobe lights in areas like large rooms, bathrooms, or spaces where people with hearing impairments may be present.
5.2 Connect the Wiring
- For conventional systems, connect sounders and strobe lights to the relevant zone.
- For addressable systems, wire the devices into the addressable loop, ensuring they are correctly assigned.
5.3 Test the Alarm
- Activate the alarm system from the control panel and confirm that the sounders sound the alarm and the visual indicators flash when the system is triggered.
Step 6: Connect Monitoring and Notification Systems (Optional)
In more advanced systems, the fire alarm can be connected to a central monitoring station or emergency services for automatic notification.
6.1 Set Up Monitoring
- If your system is monitored, connect it to a central monitoring station using the appropriate communication method, such as telephone lines, internet, or radio signals.
- This will allow the monitoring station to receive alerts and notify the appropriate authorities (e.g., fire department) in the event of a fire.
Step 7: Test the Entire System
Once all components are connected, it's time to test the entire fire alarm system.
7.1 Perform System Check
- Use the test mode on the control panel to verify that all detectors, call points, and alarm devices are properly connected and functioning.
- Simulate a fire (using a test smoke canister or heat source) to ensure the detectors trigger the alarm.
7.2 Check Power Backup
- Ensure the system works on backup power by testing the battery or emergency power supply. A fully functional fire alarm system should work in case of power failure.
7.3 Conduct a Final Walkthrough
- Walk through the entire building to ensure the alarms are audible, the visual indicators flash correctly, and all devices are operational.
- Check the wiring for any loose connections or faulty components.
Step 8: Final Documentation and Maintenance
Once the system is connected and tested, document the installation process and ensure that all components are registered and labeled. This will help during future maintenance or inspections.
8.1 Schedule Regular Maintenance
- Fire alarm systems require regular testing, maintenance, and updates. Ensure that the system is checked periodically, including battery replacements, wiring checks, and detector cleaning.
Conclusion
Connecting a fire alarm system involves careful planning, precise installation, and thorough testing to ensure that the system works effectively in the event of a fire. Whether installing a conventional or addressable system, the process requires wiring detectors, call points, alarm devices, and the control panel according to manufacturer guidelines and local regulations. Always prioritize safety, and if you're unsure about any aspect of the installation, consult with a professional fire alarm technician to ensure the system is properly connected and compliant with fire safety standards. Regular maintenance and testing are essential for keeping the fire alarm system operational and reliable.

Explore our products Range


Final Say
At VariEx.in and VariexOnline.com, we specialize in supplying and installing top-quality fire fighting systems and equipment. From fire extinguishers to advanced suppression systems, we offer comprehensive solutions tailored to your needs. Our experienced team ensures precise installation and maintenance for optimal safety.
Trust VariEx for reliable fire protection. Contact us online or call 7829629111 to learn more.
"WHAT YOU CAN READ NEXT"
 Read more +24 November 2023 in Fire Extinguisher
What types of fire extinguishers are available for different fire classes?
 Read more +11 April 2025 in Fire Suppression

